To make homemade gun cleaner, mix equal parts of vinegar and water in a spray bottle. For a stronger formula, add rubbing alcohol or dish soap.
Cleaning your firearms regularly is key to maintaining their performance and longevity. Using a homemade gun cleaner can be a cost-effective and convenient option. Not only does it save you money, but it also allows you to control the ingredients used, minimizing harmful chemicals in your household.
In this article, we’ll explore how to make homemade gun cleaner using simple ingredients found in most homes. We’ll also provide tips on how to clean your firearms thoroughly and effectively using your homemade cleaning solution.
Credit: taskandpurpose.com
Ingredients For Homemade Gun Cleaner
Homemade Gun Cleaner: Ingredients For A Practical And Affordable Solution
Maintaining a firearm can be quite a challenge, especially if you don’t have the right cleaning agent. Not everyone has the budget to splurge on expensive gun cleaning products, and that’s where a homemade gun cleaner comes in. Here’s what you need to know about making your own gun cleaner using practical and affordable ingredients.
List Of Practical And Affordable Ingredients For Making Homemade Gun Cleaner
To make your own gun cleaner, you’ll need the following ingredients that are readily available at most stores:
- White vinegar
- Water
- Isopropyl alcohol
- Baking soda
- Ballistol
- A spray bottle
- Dry lint-free cloth
- Toothbrush
- Q-tips
Explanation Of Each Ingredient’S Benefits For Gun Cleaning
- White vinegar is an excellent solvent that helps to remove dirt and grime from the gun. Its acidic nature makes it ideal for removing rust and other corrosive materials.
- Isopropyl alcohol, on the other hand, is effective at de-greasing and removing oils on the gun’s surface. It also helps to evaporate water from the metal parts.
- Adding a small amount of baking soda to the solution helps to neutralize any acidic residues and provides an extra cleaning boost.
- Ballistol is a non-toxic and biodegradable lubricant that helps to protect and preserve the gun parts as it cleans.
- Using a spray bottle to apply the solution ensures even distribution and avoids over-saturating the parts.
- The dry lint-free cloth and q-tips help to remove any excess cleaner and dry off the gun’s parts. The toothbrush helps to scrub off any tough stains or grime.
Guide For Safe Handling Of The Ingredients
When preparing your homemade gun cleaner, it’s essential to consider safe handling of the ingredients. Here are some steps to keep in mind:
- Always wear gloves to avoid skin contact with the cleaning agent.
- Ensure that the area is well-ventilated to avoid inhaling the fumes from the chemicals.
- Avoid mixing the ingredients in a metal container, which can cause a chemical reaction. Instead, use a plastic or glass container.
- Label the mixture correctly to avoid any confusion or accidental ingestion.
- Keep the solution away from children and pets to avoid accidental spills or ingestion.
Making your own homemade gun cleaner can be a practical and affordable solution to maintain your firearm’s longevity and performance. By using readily available ingredients, you can create a cleaning solution that’s customized to your gun’s needs. Just remember to handle the ingredients safely, and you’ll be on your way to a clean and well-maintained firearm.
Vinegar And Baking Soda: Natural All-Purpose Cleaners
Homemade gun cleaner: vinegar and baking soda – natural all-purpose cleaners
Maintaining a gun’s cleanliness is vital for its longevity and effectiveness. However, purchasing readily available gun cleaners can be quite expensive, and the harsh chemicals used in commercial-grade cleaners can even damage a gun’s surface. So, what can you do?
Well, the solution might be in your kitchen cabinets. Vinegar and baking soda, two common household items, can effectively clean a gun without damaging its surface. In this section, we will explain the benefits and effectiveness of using vinegar and baking soda as homemade gun cleaners.
Explanation Of How Vinegar And Baking Soda Work Perfectly For Cleaning Guns
Vinegar and baking soda are natural all-purpose cleaners that can effectively remove dirt, residue, and rust. They work by breaking down the dirt particles into smaller particles that can be easily wiped away. Vinegar’s acidic properties help dissolve rust, while baking soda’s mildly abrasive texture removes stubborn dirt buildup.
These two ingredients work together, making them perfect for cleaning guns.
How Effective Homemade Cleaning Solutions Are When Using These Ingredients
The effectiveness of homemade cleaning solutions mixed with vinegar and baking soda is impressive. They can effectively dissolve greasy oil left behind from gun powder. Additionally, they can remove rust and tough stains, which are otherwise tough to remove. Moreover, the combination of vinegar and baking soda can clean and deodorize a gun in one go, eliminating the need to use multiple cleaning products.
Tips For Mixing And Applying Vinegar And Baking Soda
To mix these two ingredients, create a paste-like form by mixing baking soda and vinegar in a bowl. Once the paste is ready, apply it to a soft-bristled brush and use it to scrub the gun’s surface gently. Once you are done, wipe the surface with a dry and clean cloth until it’s spotless.
Here are some tips to bear in mind:
- For best results, use distilled white vinegar as it is less harsh than other vinegar types
- Mix vinegar and baking soda to form a paste-like texture until it’s smooth and free from lumps
- Don’t let the paste stay on the gun’s surface for too long as it can corrode the metal finish
Using vinegar and baking soda as homemade gun cleaners is a safe, cost-effective, and most importantly, an environment-friendly way to maintain your gun’s cleanliness. Following the above tips will provide you with a hassle-free cleaning experience. With these natural ingredients, you won’t have to worry about damaging your gun’s surface while using effective cleaners that are readily available in your kitchen.
Lemon Juice: Mild Acidic Alternative
Why Lemon Juice Is A Better Option Than Vinegar
If gun owners prefer to use a mild acidic alternative, lemon juice is an ideal choice for homemade gun cleaning solutions. Here are some of the reasons why it is a better option than vinegar:
- Lemon juice has a milder acid content than vinegar, which makes it gentler on the firearm’s metal parts.
- Vinegar is highly alkaline, and using it can lead to rusting, which is a nightmare for gun enthusiasts.
- Lemon juice is an organic and natural substance, and it does not contain any harsh chemicals that could damage the firearm.
How To Handle And Apply Lemon Juice For Gun Cleaning
Applying lemon juice for gun cleaning is relatively easy, but it’s vital to follow a few simple steps to ensure efficacy and safety. Here’s how to do it:
- Squeeze the lemon juice into a small container and dilute it with warm water. Mix them well.
- Apply the solution using a microfiber cloth or a soft-bristled brush, making sure to cover all parts of the firearm.
- Leave the solution for a few minutes to allow it to penetrate and loosen the dirt.
- Scrub the metal parts with a soft brush, preferably a toothbrush, to remove tough stains.
- Use a clean microfiber cloth to wipe away the dirt and the solution.
Comparison Of Results Achieved With Vinegar And Baking Soda, And Lemon Juice
Vinegar and baking soda are popular alternatives for gun cleaning. However, when compared to lemon juice, these options have their drawbacks. Here’s how they fare in comparison:
- Vinegar and baking soda leave a strong scent, and the residue from these products can be difficult to remove.
- Lemon juice has a pleasant scent and leaves no residue, making the cleaning process more comfortable.
- Vinegar is highly alkaline, which can increase the risk of rust formation on firearms.
- Baking soda is mildly abrasive and can cause wear on gun parts over time.
- Lemon juice is non-abrasive and gentle on metal parts, making it an ideal choice for cleaning firearms.
Using lemon juice as a mild acidic alternative for gun cleaning is an ideal choice. It is organic, does not damage metal parts, and can help prevent rust formation. With these simple steps, gun enthusiasts can maintain their firearms’ cleanliness and safety while avoiding harsh chemicals.
How To Create Your Homemade Gun Cleaning Solution
Creating your own homemade gun cleaner is an easy and cost-effective way to keep your firearms in top condition. Not only is it simple to make, it’s also customizable for your individual needs.
Detailed Step-By-Step Procedure To Prepare Your Homemade Gun Cleaner
Here is a detailed step-by-step guide to help you prepare your homemade gun cleaner:
- Gather the ingredients: To make your homemade gun cleaner, you’ll need the following ingredients:
- 1 cup of distilled water
- 1 cup of white vinegar
- 1 tablespoon of dish soap
- 1 tablespoon of baking soda
- Mix the ingredients: Mix all of the ingredients together in a spray bottle.
- Shake well: Shake the bottle well to ensure that all the ingredients are evenly mixed.
Guidelines On Ensuring Consistency In Mixing The Ingredients
To ensure consistency in mixing the ingredients, follow these guidelines:
- Use the same measurements: Make sure to use the exact measurements outlined in the recipe to ensure consistency.
- Mix thoroughly: Be sure to mix all of the ingredients together thoroughly to ensure that they are evenly distributed.
Tips For Packaging And Storage
Proper packaging and storage are important to ensure the longevity and effectiveness of your homemade gun cleaner. Here are some tips to keep in mind:
- Use a spray bottle: Use a spray bottle to ensure that you can evenly apply the cleaner to your firearm.
- Store in a cool, dry place: Make sure to store your homemade gun cleaner in a cool, dry place to prevent it from going bad.
- Label the bottle: Clearly label the spray bottle with the type of cleaner and the date it was made.
With this simple recipe and guidelines, you can create your own customized and cost-effective homemade gun cleaner. Remember to test the cleaner on a small area of your firearm before using it on the entire surface. Happy cleaning!
Preparing Your Gun For Cleaning
Explanation Of Why Ensuring The Proper Preparation Of Your Gun Is Crucial
Preparing your gun before cleaning is an important aspect to ensure that the cleaning process is effective and safe. Here are a few reasons why it is crucial to prepare your gun before starting the cleaning process:
- A dirty gun will make the cleaning process harder and less effective. If you haven’t prepared your gun correctly, then you may not be able to reach certain areas that need cleaning, or you may not be able to remove all the dirt and grime that has built up.
- Not preparing your gun properly can cause damage to your gun even if you use the correct cleaning solutions. Dirt and grime can combine with the cleaning solutions to create a gritty substance that gets stuck in the gun’s mechanisms, leading to damage.
- Ensuring proper preparation can save you time, allowing the cleaning process to go more smoothly and quickly. The last thing you want is to spend longer cleaning than necessary or to realize a section of your gun was missed in the cleaning process.
Step-By-Step Guide To Prepare Your Gun For Cleaning
Here is a simple, step-by-step guide to preparing your gun for cleaning:
- Ensure that your gun is unloaded and that there is no ammunition nearby. Always treat your gun as if it is loaded and take the necessary precautions.
- Disassemble your gun, being careful to keep track of all the parts. This step is essential, as it allows you to access areas of your firearm that are difficult to reach while assembled.
- Use a clean, dry cloth to wipe off any loose dirt, dust, or debris that may have accumulated on the surface of your firearm.
- Check your gun’s manufacturer’s instructions for specific cleaning needs or techniques that should be avoided. Familiarize yourself with any specific parts that require special attention.
- Inspect your gun for signs of wear or damage that may have occurred during your last use. Keep an eye out for cracks, dents, or any other types of damage that may need attention.
Tips For Safety During The Cleaning Process
Firearm cleaning can be a dangerous process if not handled with care. Here are a few tips to ensure that you remain safe while cleaning your gun:
- Always wear protective gloves to protect your hands from the cleaning solutions you’ll be using.
- Work in a well-ventilated area, as some cleaning solutions emit fumes that can be harmful if inhaled.
- Never use a cleaning solution that is not recommended by your gun’s manufacturer. It is essential to use a cleaning solution that is specifically designed for your firearm.
- Keep your gun pointed in a safe direction at all times and remember that the gun should always be treated as if it is loaded.
- Once you’ve completed the cleaning process, ensure that all parts are correctly reassembled, and the gun is functioning correctly before using it again.
Applying Your Homemade Gun Cleaner
Detailed instructions on how to apply your homemade gun cleaner to your firearm:
Before getting started, make sure to assemble all the necessary items for cleaning your gun. These may include your homemade gun cleaner, cleaning patches, nylon brush, cleaning rod, and a microfiber cloth.
- Disassemble the gun: Since your homemade gun cleaner is specific to cleaning your gun’s parts, it’s recommended that you disassemble it. This allows you to clean each part individually and with precision.
- Apply the cleaner: Once you’ve disassembled the gun, take the cleaning rod, dip a cleaning patch into the cleaner and lightly apply it to every part. Each part should be thoroughly coated but not overly soaked.
- Scrub the parts with a nylon brush: After coating each part with the cleaner, take the nylon brush and scrub each part in a circular motion. This step helps to loosen any residue that might have accumulated in the parts.
- Wipe the parts clean with a microfiber cloth: Once you’ve scrubbed each part with the nylon brush, you can use a microfiber cloth to wipe the parts clean. Make sure to wipe each part gently so as not to leave any residue.
Guidance on the appropriate amount of cleaning solution to use:
When applying your homemade gun cleaner, the key is to use enough cleaner to coat each part without oversaturating. Applying too much cleaner can cause it to seep into sensitive areas, such as the trigger mechanism, which can cause damage.
Tips for cleaning specific parts of your gun, such as the barrel and trigger:
- Cleaning the barrel: The barrel is one of the essential parts of the gun that requires proper cleaning. Run the cleaning rod through the barrel with a cleaning patch attached to remove any debris and residue from the gunpowder.
- Cleaning the trigger: The trigger is a sensitive part of the gun that requires gentle cleaning. Apply a small amount of the homemade gun cleaner to a cotton swab and rub it onto the trigger mechanism. Wipe the trigger clean with a dry microfiber cloth.
Remember to take caution when cleaning each part to prevent any damage or scratches to the surface.
Homemade gun cleaner is an effective and affordable way to keep your gun in good condition. With a little bit of patience, care, and attention, you can make sure your gun lasts a long time, providing you with a reliable and safe shooting experience.
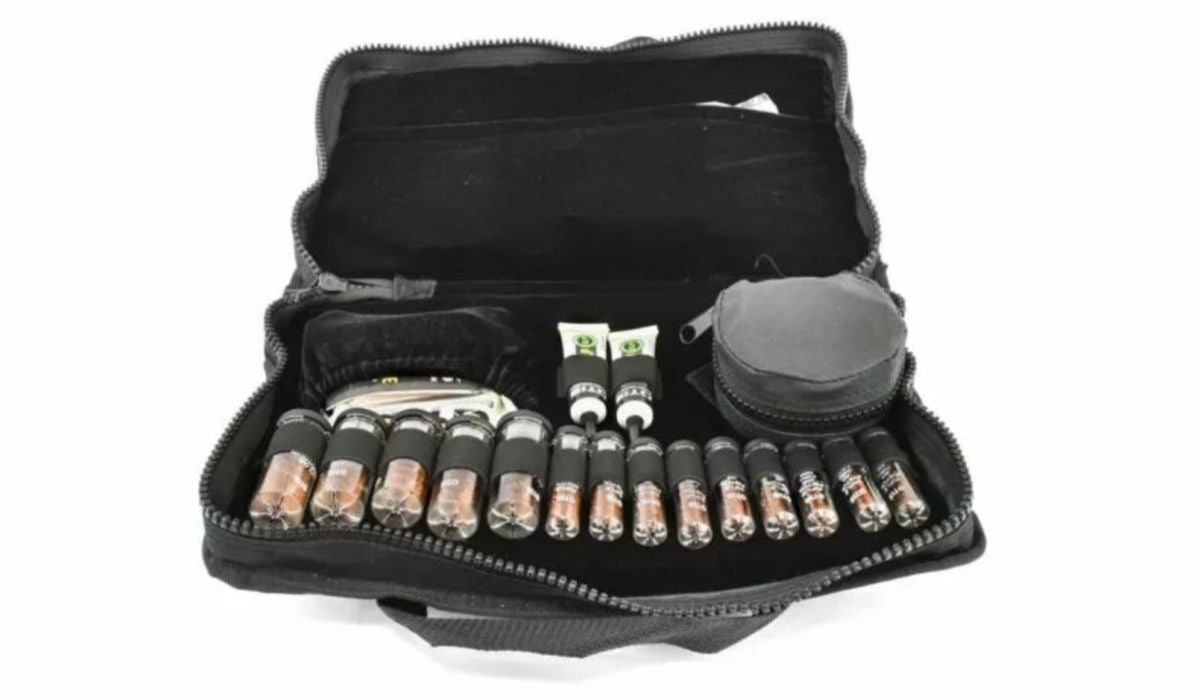
Other Essential Diy Gun-Cleaning Tools
When it comes to gun cleaning, having the right tools is essential for a thorough and efficient job. Along with creating your homemade gun cleaner, there are other diy tools that you can make to maintain your firearms. Here is a list of other essential tools to make your diy gun cleaning quicker and more efficient:
1. Cleaning Patch Holder
A cleaning patch holder is a small tool that is used to hold a cleaning patch in place while cleaning the bore of your firearm. It allows you to apply pressure to the patch while it moves through the barrel, helping to ensure that it cleans the entire surface.
To make one, you can use a small section of a wire coat hanger and bend it into a “u” shape.
2. Bore Light
A bore light is a simple tool that allows you to see inside the barrel of your gun while cleaning it. This is especially helpful when examining the bore for dirt, copper buildup, or any other signs of damage. You can make a bore light using a small flashlight and a plastic or metal tube that is the same diameter as the bore of your firearm.
3. Dental Pick
A dental pick is a versatile tool that can be used to clean hard-to-reach areas of your firearm. It is especially helpful when cleaning the trigger assembly, bolt face, and other tight spaces. To make a diy dental pick, all you need is a sturdy piece of wire (such as a paperclip) and a handle made from wood, plastic, or another material of your choice.
4. Cleaning Jags
Cleaning jags are small tools that are used to hold cleaning patches in place while cleaning the bore of your firearm. They come in various sizes to fit different calibers. To make a diy cleaning jag, you can use a small section of brass or aluminum rod and file a small notch into one end to hold the cleaning patch.
5. Gun Vise
A gun vise is a tool that helps to hold your firearm steady while cleaning it. This makes it easier to work on the firearm and reduces the risk of accidentally damaging it. To make a diy gun vise, you can use a pair of wooden blocks and a v-shaped cutout to hold the firearm in place.
By using these essential diy gun-cleaning tools, you can make the cleaning process simpler and more efficient. With a little effort, you can create these tools at home to ensure that your firearms are always in top condition.
Microfiber Cloths: The Perfect Cleaning Companion
How Microfiber Cloths Are Better Than Traditional Rags:
Microfiber cloths have revolutionized the cleaning industry, including gun cleaning. Microfiber cloths are better than traditional rags in various ways due to their unique fiber construction, which makes them more effective in picking up dirt, dust, grime and leaving no residue.
Some of the benefits of using microfiber cloths include:
- They can hold up to seven times their weight in water, allowing them to absorb more cleaning solution and clean more effectively.
- The fibers in microfiber cloths are incredibly fine, making them softer than your average cleaning cloth and gentler on gun surfaces.
- Microfiber cloths can clean surfaces without leaving any scratches or lint behind, and they are ideal for dusting and wiping off debris.
- They are reusable, machine washable, and dry quickly.
Comparison Of Their Cleaning Effectiveness With The Type Of Soils On Guns:
When it comes to gun cleaning, microfiber cloths are more effective than traditional rags for cleaning various types of soils. Microfiber cloths can handle different types of gun cleaning solvents, oils, and dirt, without leaving any residue or scratches. Here are some examples of how microfiber cloths compare with traditional rags for cleaning different soils on guns:
- Grease and oil: Microfiber cloths are more effective in removing grease and oil from gun surfaces compared to traditional rags. They pick up oily residues easily and help ensure a cleaner surface without leaving any streaks or smears behind.
- Carbon build-up: Microfiber cloths are excellent for removing carbon build-up from the barrel or other parts of the gun. The fine fibers are perfect for cleaning tight spaces and can lift off carbon without damaging the gun’s surface.
- Dust and debris: Microfiber cloths are the perfect choice for dusting and cleaning debris from gun surfaces without scratching or leaving any residue. They can pick up dust and debris quickly and effectively.
Guidance On How Many Microfiber Cloths Are Needed:
Determining how many microfiber cloths to use for gun cleaning depends on the size of your gun collection, the type of cleaning and maintenance tasks that need to be done. Here are some general guidelines:
- Use at least two microfiber cloths; one for applying gun cleaning products and the other for wiping them off.
- Always have a few extra microfiber cloths on hand. It’s advisable to have several clean cloths to avoid spreading dirt or grime around.
- After use, wash and dry the cloths or designate separate cloths for separate cleaning tasks to prolong their lifespan.
With these tips, you’re now ready to use microfiber cloths to clean your guns effectively and efficiently. Remember, always use high-quality microfiber cloths to get the best results.
Toothbrushes: The Perfect Ammo For Nooks And Crannies
Homemade gun cleaner: toothbrushes – the perfect ammo for nooks and crannies
Maintaining your firearms clean should be a top priority for any gun owner, but the task may be daunting without the proper tools. When it comes to keeping your guns in pristine condition, toothbrushes can come in handy as they’re affordable, easily accessible, and versatile.
Here’s why:
Why Toothbrushes Are A Valuable Tool For Gun-Cleaning
A brush resembling a toothbrush can reach small and tight areas in your firearm with ease, areas that would be difficult to reach with a cloth or other cleaning tools. Why use a toothbrush for gun cleaning? It’s strong enough to scrub grime away but gentle enough not to damage delicate parts.
Some surfaces, like the trigger components, collect dust and dirt over time. These surfaces can cause malfunctions. A toothbrush’s stiff bristles can remove buildup allowing your firearm to function correctly.
Explanation Of How To Use A Toothbrush Effectively
Clean your gun in a well-ventilated area. Assembly and disassembly should be done according to the manufacturer’s instructions. Remove spare magazine/s and ensure all bullets are emptied.
- Dampen the toothbrush bristles and add a small amount of gun cleaner onto the bristles.
- Place the toothbrush bristles on the parts to be cleaned and apply gentle pressure to scrub the grime gently.
- Avoid pressing too hard so that you do not scratch delicate surfaces.
- Repeat the process till the grime disappears even on hard-to-reach nooks and crannies.
Tips On The Best Toothbrushes Types And Size To Use
Toothbrushes come in various sizes, shapes, and stiffness. When choosing a toothbrush for gun cleaning, choose one that adheres to these guidelines:
- A soft bristle toothbrush: It’s best to get a toothbrush that is labeled as ‘soft’. Hard or medium-bristled toothbrushes can damage delicate parts.
- Angled tip toothbrush: An angled toothbrush allows you to reach and clean tight spots effectively.
- Disposable toothbrush: Although a manual toothbrush can be used to clean your gun, it’s wise to use disposable toothbrushes. The bristles are new and clean, therefore decreasing the risk of introducing dirt or grime into your firearm.
Using a toothbrush for gun cleaning is practical, economical, and efficient if done correctly. Be sure to get a toothbrush with soft bristles, an angled tip, and make sure you can get to every nook and cranny to clean.
Frequently Asked Questions For Homemade Gun Cleaner
What Is Homemade Gun Cleaner Made Of?
Homemade gun cleaners are usually made of a combination of simple household ingredients like white vinegar, baking soda, and dish soap. They effectively clean firearms and save money.
Is Homemade Gun Cleaner Safe?
Homemade gun cleaner is safe as long as it is used properly. Avoid using harsh chemicals that can damage gun parts. Follow the recipe directions to prevent any accidents.
How Often Should I Clean My Gun?
Experts recommend cleaning your gun after every shooting session or every 300-500 rounds. Regular cleaning prevents dirt buildup, corrosion, and damage to your firearm.
Can I Use Homemade Gun Cleaner On Any Type Of Gun?
Yes, homemade gun cleaners can be used on any type of gun. However, certain types of firearms (like antique guns) require special cleaning methods, so check with a gun professional.
How Should I Store Homemade Gun Cleaner?
Homemade gun cleaner should be stored in a cool and dry place, preferably in a labeled container away from children and pets. Use the cleaner within its shelf life for best results.
Conclusion
Based on the methods and ingredients we have outlined, it is clear that a homemade gun cleaner can be just as effective as store-bought alternatives. With easy-to-find household items and a little creativity, gun owners can save money and create a custom cleaner tailored to their specific firearms.
However, it is important to remember the importance of gun safety and proper cleaning techniques. Always ensure your gun is unloaded and follow manufacturer instructions carefully. It’s also worth noting that some gun-cleaning tasks are best left to professionals, especially if you’re dealing with more complex weapons.
Homemade gun cleaner is a great option for simple cleaning needs, but for more involved tasks or if you’re in doubt, trust the experts. Overall, homemade gun cleaner is a useful and cost-effective solution for many gun enthusiasts, and we hope you’ve found these recipes helpful.

Leave a Reply